▌ Executive Summary
This project covers the wall and floor stone finishes for five elevator lobbies. Production has now been completed for all five elevator lobbies. Every wall and floor tile uses a 5 mm Classic Beige Travertine surface bonded to a 15 mm aluminum honeycomb panel, creating a nominal 20 mm composite construction that reduces panel weight while retaining the appearance of natural travertine.


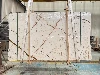
Because the wall and floor pieces form coordinated installation areas, production is controlled as a complete layout rather than as unrelated tiles. Slab scans are used in AutoCAD to simulate cutting, joint positions and vein direction before fabrication. The completed pieces are now being numbered, measured and dry laid by area so that colour movement, directional texture, adjacent joints, dimensions, thickness and edge condition can be verified before export packing.
▌ Project Specification
▌ Why Use Aluminum Honeycomb Behind Travertine?
Elevator lobbies can require extensive stone coverage across walls and floors, while the supporting structure and installation system may benefit from lower panel weight. Reducing the natural stone layer to 5 mm and bonding it to a rigid 15 mm aluminum honeycomb panel provides a lighter composite format than a conventional solid stone panel of the same overall thickness.
The honeycomb backing also supports the thin travertine during fabrication, handling and installation. Final suitability still depends on the approved fixing or bedding system, substrate, joint design, traffic conditions and project requirements.

▌ Composite Tile Production Workflow
- 1. Review the architectural scope and prepare or coordinate shop drawings for each elevator-lobby wall and floor area.
- 2. Select Classic Beige Travertine slabs and review colour range, surface character and usable areas.
- 3. Use slab scans in AutoCAD to simulate tile cutting, joint relationships and vein direction before fabrication.
- 4. Cut oversize travertine blanks and prepare matching 15 mm aluminum honeycomb panels.
- 5. Prepare the bonding surfaces, apply structural adhesive and press the stone and honeycomb components under controlled conditions.
- 6. Calibrate and finish the travertine surface to the required 5 mm stone layer, then trim the composite tiles to the approved final dimensions.
- 7. Clean exposed edges, inspect bonding and dimensions, apply piece labels and dry lay the finished tiles by installation area.
- 8. Replace nonconforming pieces when required, complete final inspection and pack the numbered tiles for export.
▌ Dry Layout and Quality Control
The finished composite tiles are arranged in coordinated wall and floor groups before packing. This full-area review is important because an acceptable individual tile may still appear inconsistent beside adjacent pieces. The dry layout therefore checks the installation as a visual system rather than as isolated units.
- • Correct piece number, wall reference, floor reference and orientation
- • Consistent vein direction and balanced natural colour movement
- • Acceptable transitions across adjacent tile joints
- • Finished dimensions, squareness, total thickness and edge condition
- • Surface finish, filled areas and visible stone defects
- • Bond-line condition and signs of local debonding or honeycomb damage
- • Clean exposed honeycomb edges without trapped cutting slurry or loose aluminum burrs
▌ Frequently Asked Questions
Q: What is the construction of the elevator-lobby tiles in this project?
A: Each wall or floor tile has a 5 mm Classic Beige Travertine surface bonded to a 15 mm aluminum honeycomb panel, giving a nominal total thickness of 20 mm.
Q: Why is scanned-slab AutoCAD layout used before cutting?
A: The layout allows the factory and project team to review vein direction, colour distribution, joint transitions and cutting yield against the approved wall and floor references before fabrication begins.
Q: Are the finished tiles dry laid before packing?
A: Yes. The numbered tiles are arranged by installation area so that adjacent pieces, directional texture, colour movement, joint relationships and visible defects can be checked before packing.
Q: Can Landiview Stone produce other stone-and-honeycomb sizes?
A: Yes. Dimensions, natural stone, finish, edge treatment and panel build-up can be developed against the approved drawings and technical requirements. The fixing method and intended use should be confirmed before production details are finalised.